ProTip: How to Add Fields to Your Form Templates
Originally published on 12/08/2016
What are fields and why do I need them in my digital forms?
Fields are the backbone and structure of your digital forms. Each field is designed to collect data from people who fill out your forms. Whether you’re creating a simple electronic signature form or a complex work order, every digital form needs fields to capture information.
GoFormz supports many different field types, like text boxes, drop-downs, numbers, images, dates, locations – and even sketches!
In this blog, we’ll go through step-by-step on how you can add fields to your digital forms.
Step-by-Step on How to Add Fields
Step 1: Log in to Your GoFormz Account
To get started, log in to your GoFormz account from a computer.
Step 2: Create a Template
Navigate to the Templates Tab in the menu bar. Then, choose whether you would like to digitize an existing form or start from scratch with a blank Template.
Note: A Template is the main version of your digital form. Creating a Template is the first step towards filling out and sharing your digital forms. You will use this Template to generate new forms that can be filled out.
Step 3: Open the Template Editor
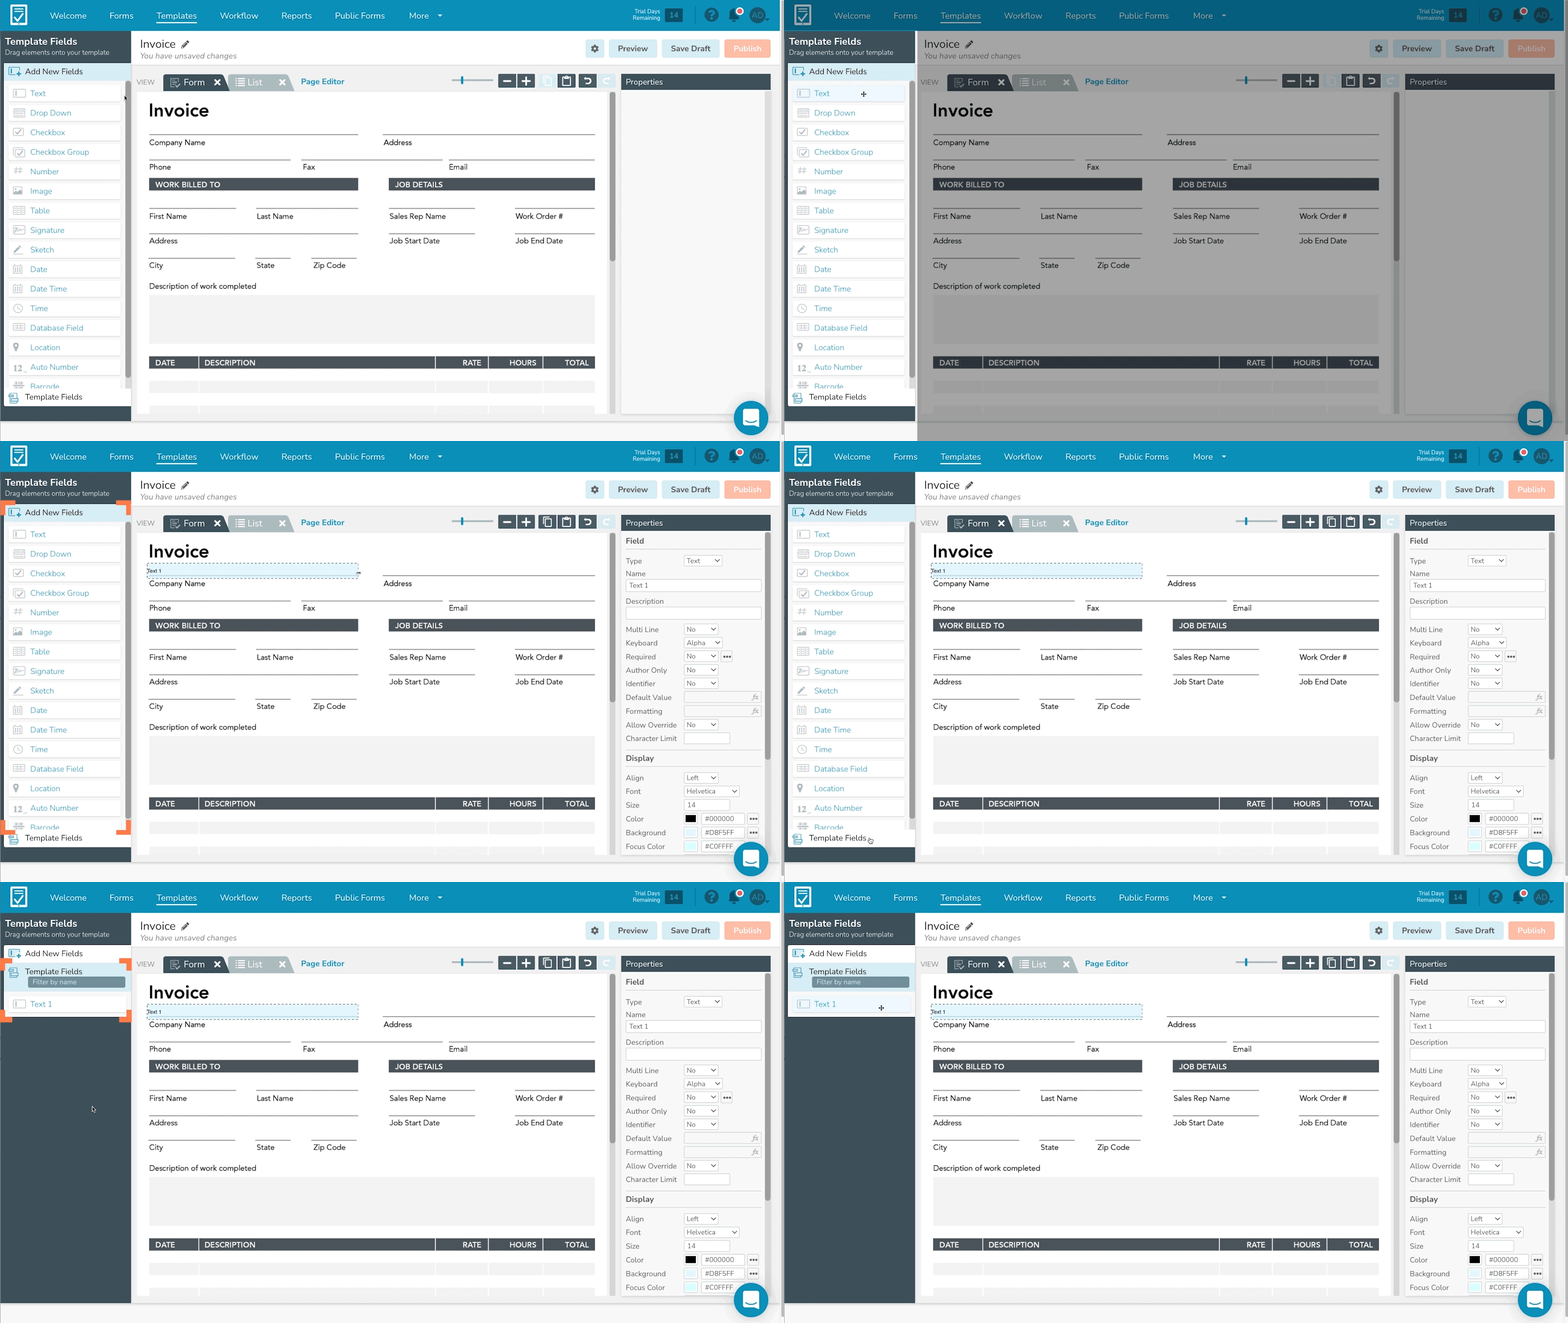
Once your Template is selected, the Template Editor will appear. This is where you can add, edit, and arrange fields.
Step 4: Locate the Template Fields Panel
Find the Template Fields Panel on the left-hand side of the editor. The “Add New Fields” section lists all the available field types that can be added to your Template. At the bottom of the panel, the “Template Fields” section lists all the fields that already exist in your Template.
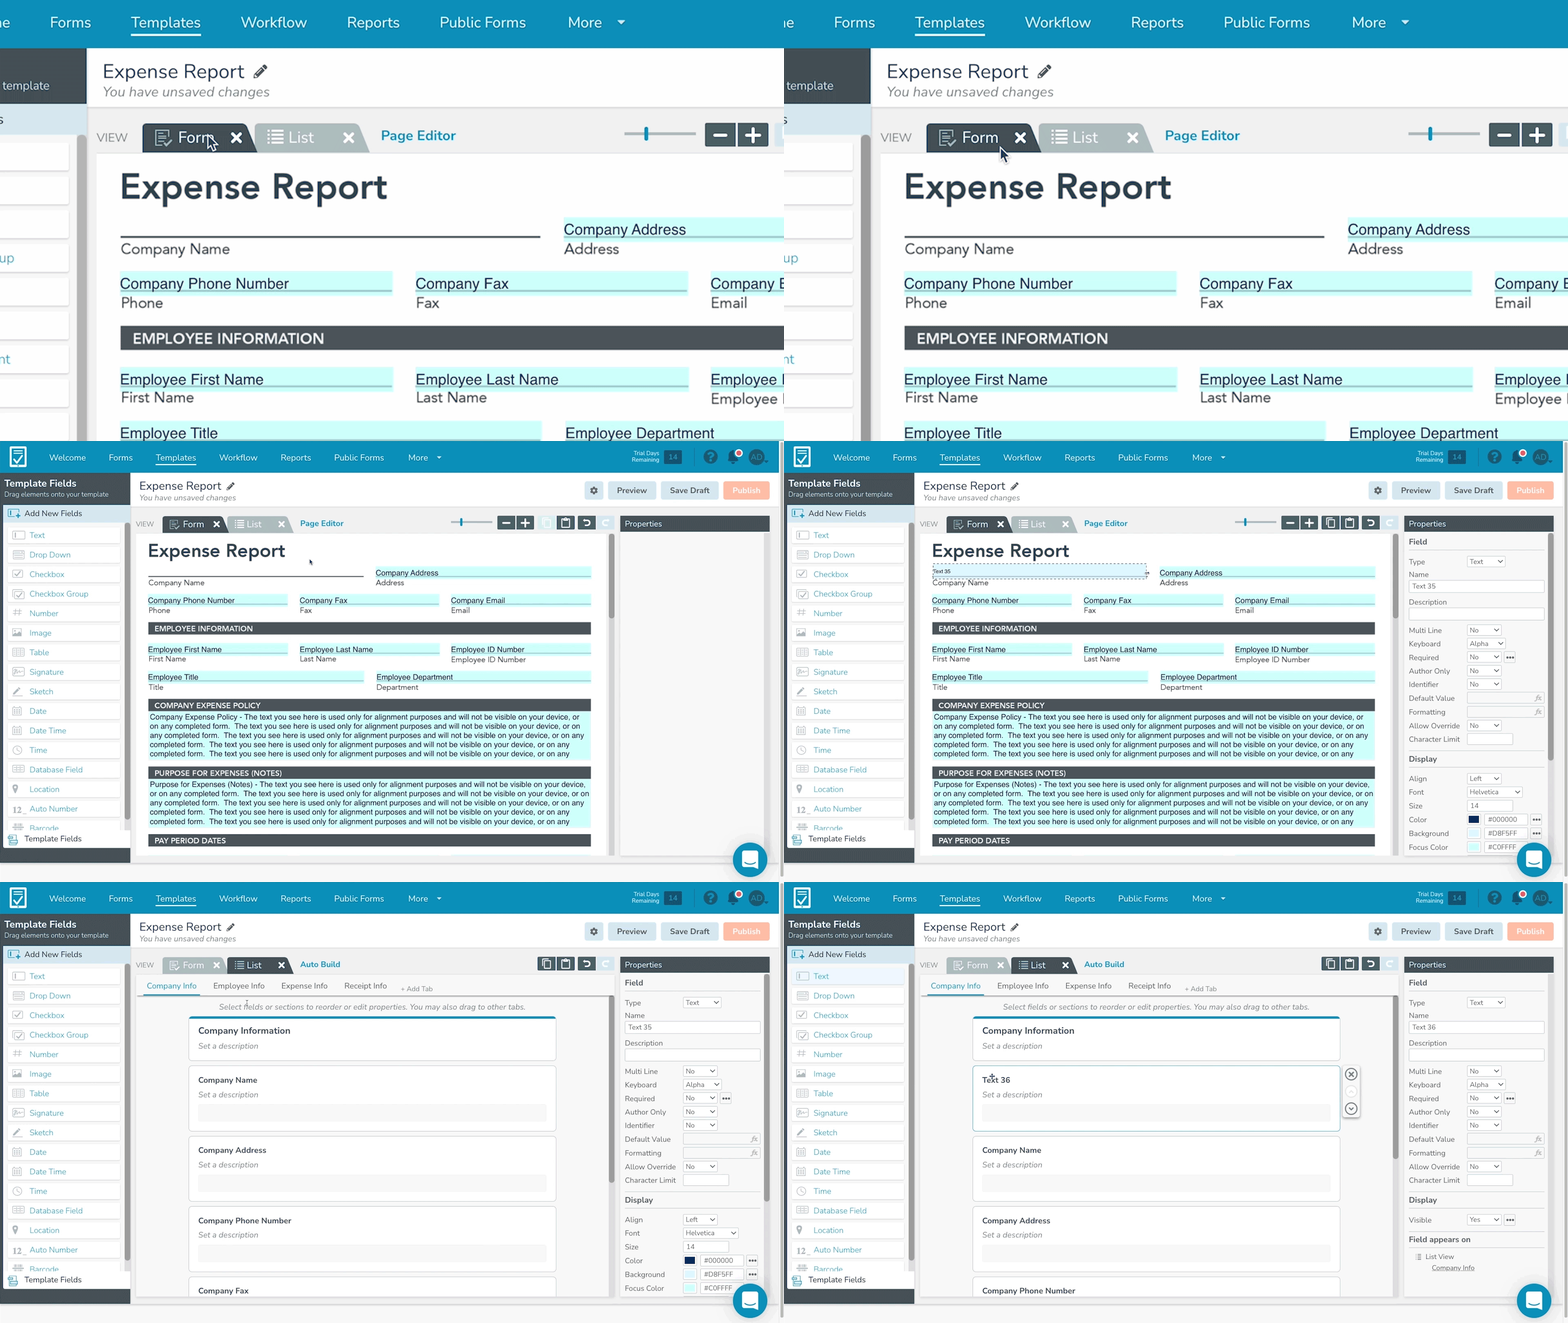
Note: GoFormz offers two views to choose from: Form View and List View. Form View allows you to create digital forms that look exactly like your existing paper forms. List View is helpful when you want to create a form from scratch or fill out forms on smaller devices – like smartphones.
Step 5: Drag-and-Drop Fields Onto Your Template
Now, select a field type that best suits the information you want to collect. To add a field in Form View, drag-and-drop the field onto the location that matches your Template. Next, use your cursor to resize the field.
In List View, drag-and-drop a field onto your Template. You can add these fields in any order, sort them in sections, and add tabs to create more pages.
Step 6: Customize Your Field’s Properties
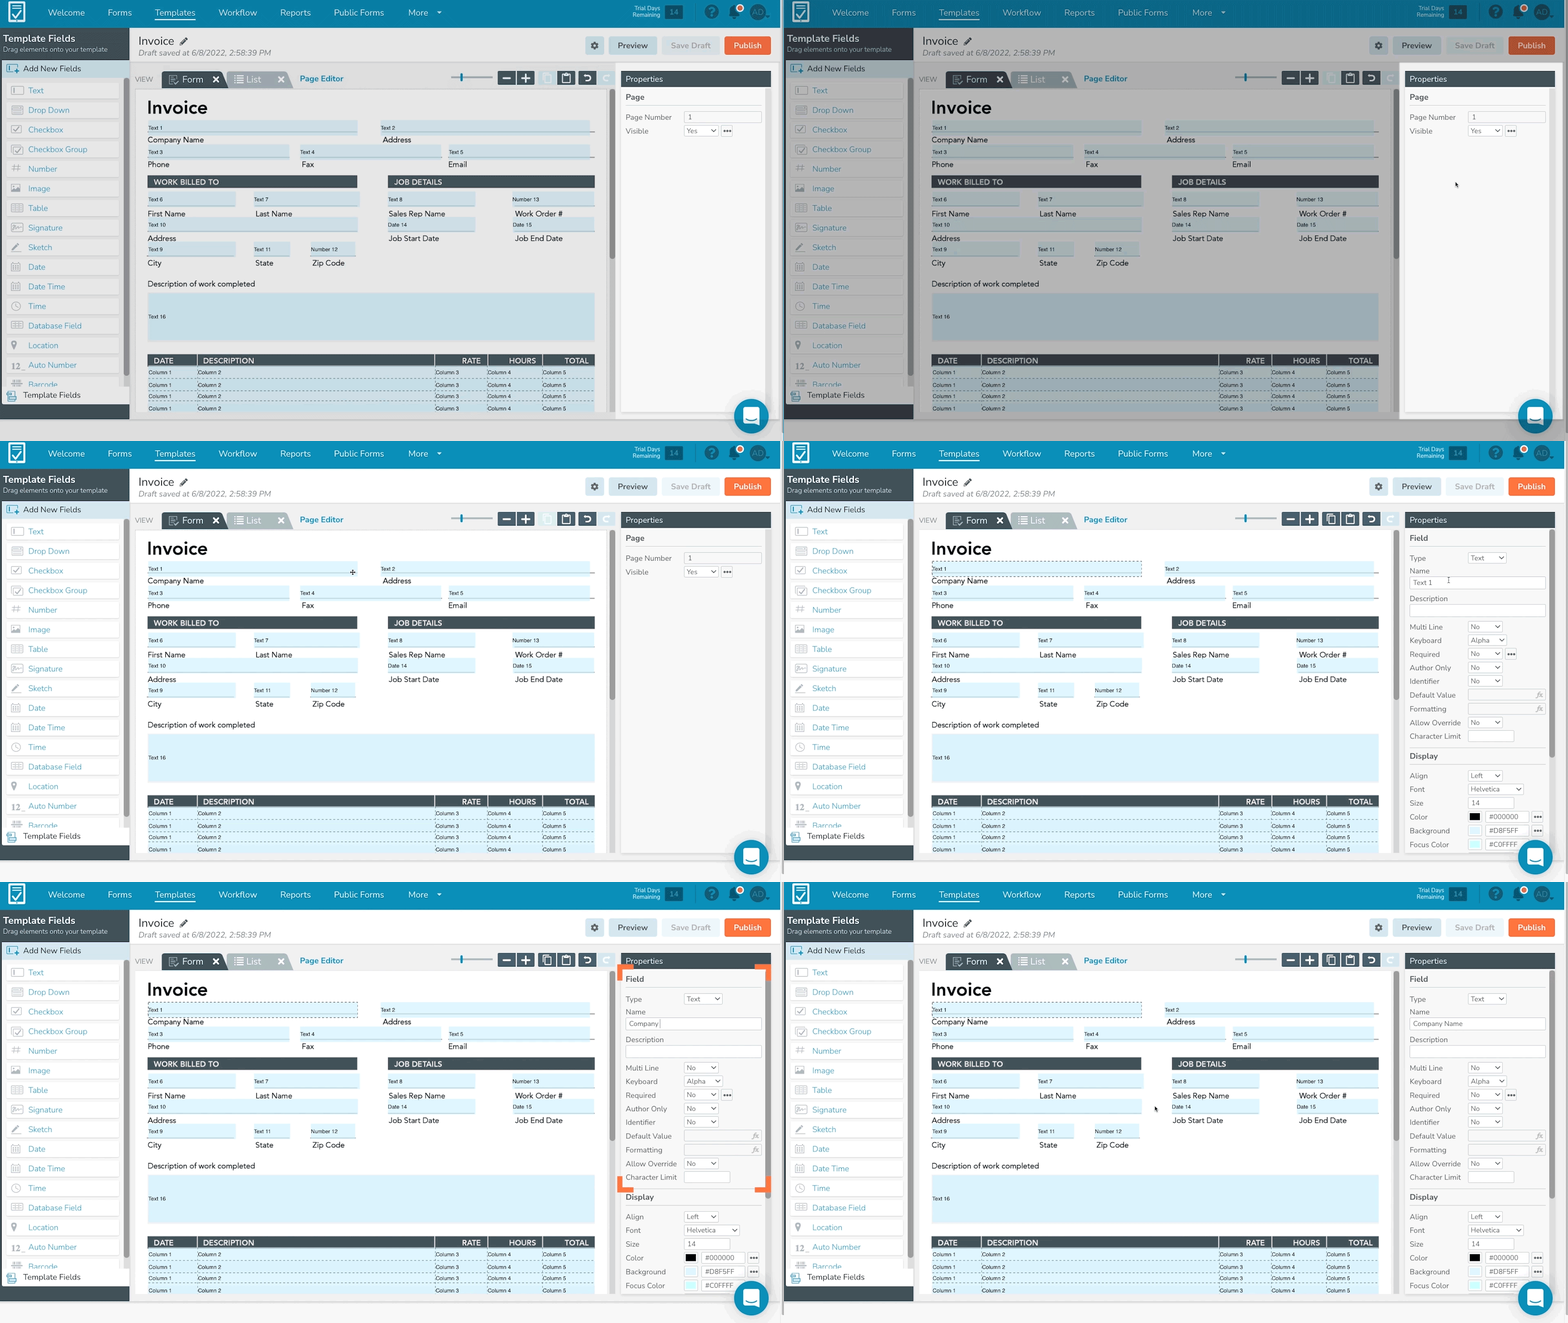
You can now customize the properties of your field, including its name, requirements, formatting, and more. Locate the Properties Panel along the right-hand side of the Template Editor. Here you can adjust your field’s properties as needed.
Note: We recommend naming your fields, so they can be easily located, edited, and reported on.
Step 7: Save & Preview
Once all your fields have been added, click the “Save Draft” button to save your progress. Then, click the “Preview” button to see how your digital form will look and behave when filled out. Here, you can test out each of your fields, any logic added to your form, and custom actions. Repeat Step 7 until you are satisfied with your digital form.
Step 8: Publish Your Template
Once you have tested your Template, hit the “Publish” button. You can now use your Template to generate new forms in the mobile app or online from a web browser.
Ready to Build Your Own Template?
By following these steps, you can seamlessly add fields to your Templates. From offline mobile forms to employee evaluations, every digital form needs fields to collect data. Try fields for yourself and see what all you can do with GoFormz!
If any questions arise along the way, we're here to help! Check out our support articles or reach out to our amazing support team.


