
ProTip: Schedule Custom GoFormz Reports
This blog post was written for our Legacy Reporting Tool. To learn more about our new and improved Reporting Tool, please click here.
Isolated data, is wasted data. Using GoFormz reporting, put your data to work with compelling real-time analysis and rapid application. Take full advantage of your data collection — get to know your reporting potential below:
Why use GoFormz Reports?
Thanks to the ease and speed of GoFormz, our users collect significant amounts of data. GoFormz reports translate collected data, resulting in meaningful insights that help your operation optimize and grow. Your GoFormz report can analyze your business’ productivity, growth, compliance and more — providing valuable visibility into your workflow.
GoFormz reporting also simplifies your data exports, acting as a simpler, cleaner means of exporting collected data (rather than directly exporting each form submitted).
GoFormz Reporting Scope
Typically, your GoFormz report will be a table comprised of columns representing form fields, and rows representing form types. Think of you reports like a spreadsheet of your GoFormz data, displaying a filtered collection of your account's information. Your GoFormz reports are dynamic, allowing your team to select the type of data, and forms, they would like included.
Reports can also include Shared Field Metadata, like form name, submission date, etc., allowing for a thorough analysis of your account’s activity. You can also create custom shared fields, which can be reported on across a variety of Templates, broadening the range of your reporting.
Note: Images, Signatures, Sketches and Locations/Maps cannot be included within reports.
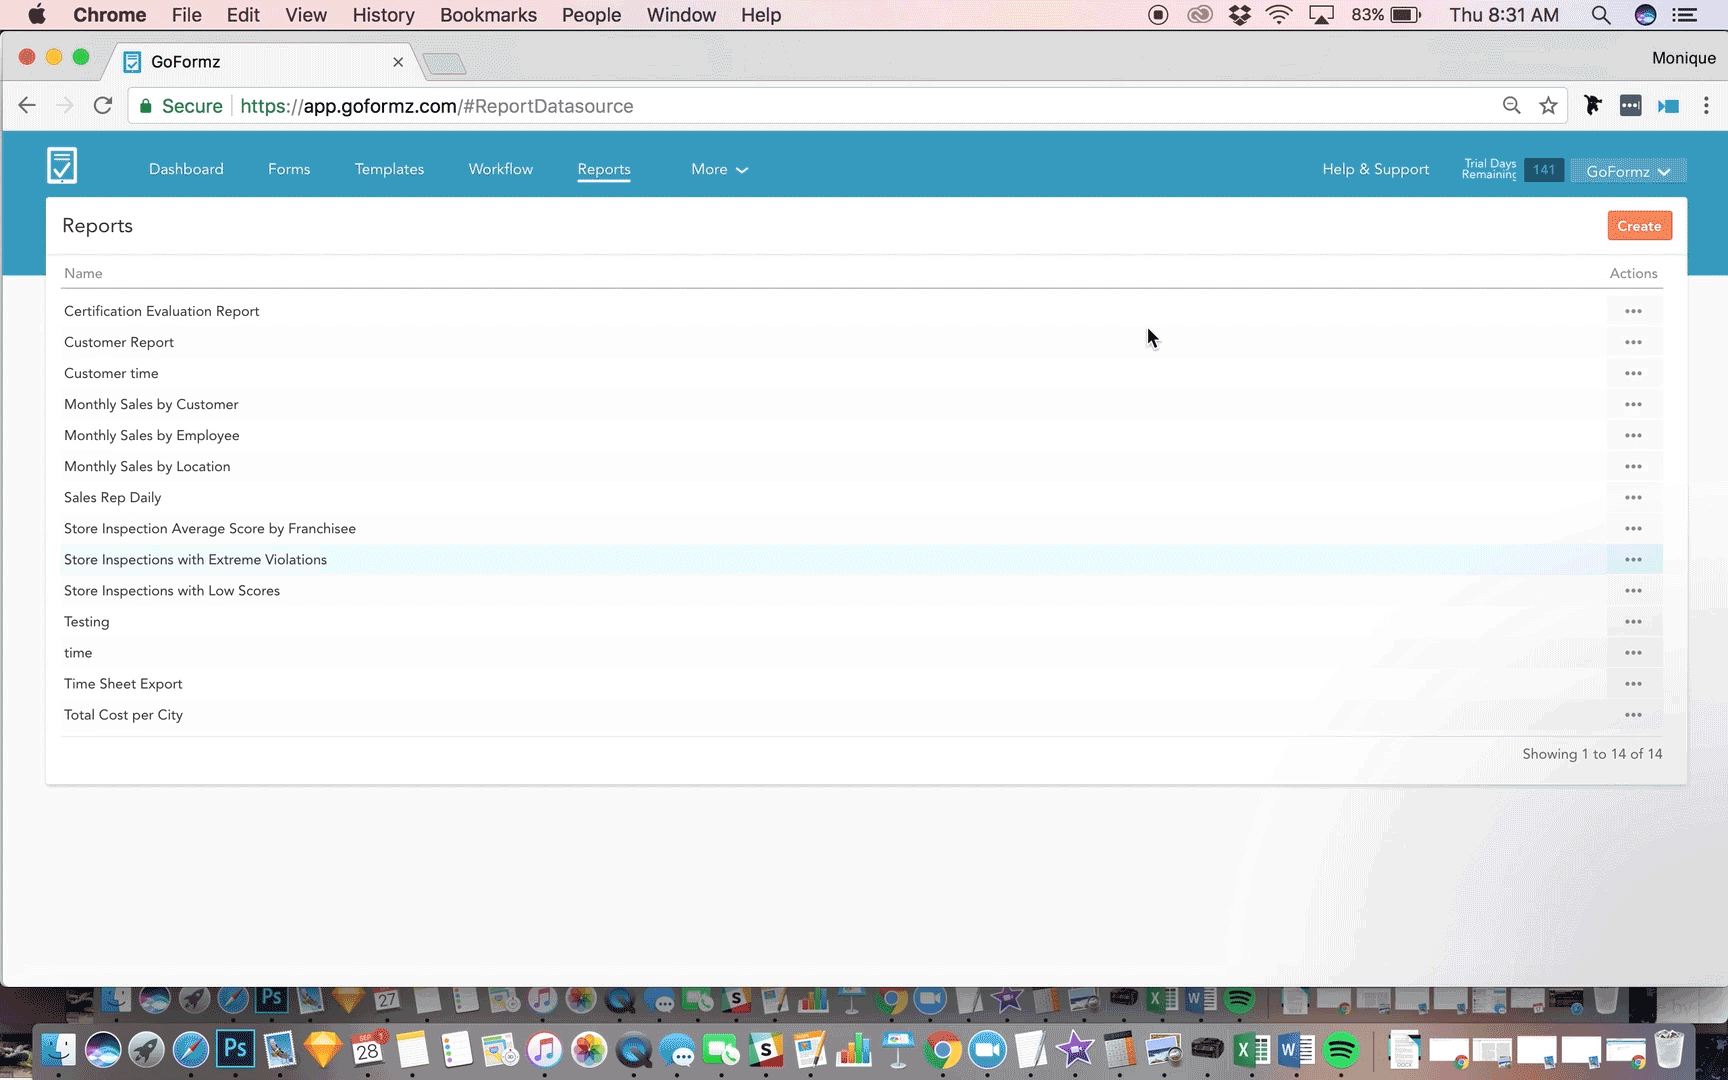
How to run a Report
To create your new report, make your way to the Reports tab.
1. Select [Create], your Report Editor will load.
2. To run a report for a specific Form Template, select the Template from the Form Template drop down menu, in the top left corner. The fields within your selected Template will load in the ‘Available Columns’ section. There will also be available Shared Fields within this section, which can be used with every Template.

3. To add your columns, drag them to the ‘Report Preview’ area. Sample data will immediately load (this data is sample only, it will not show the entirety of your report data).
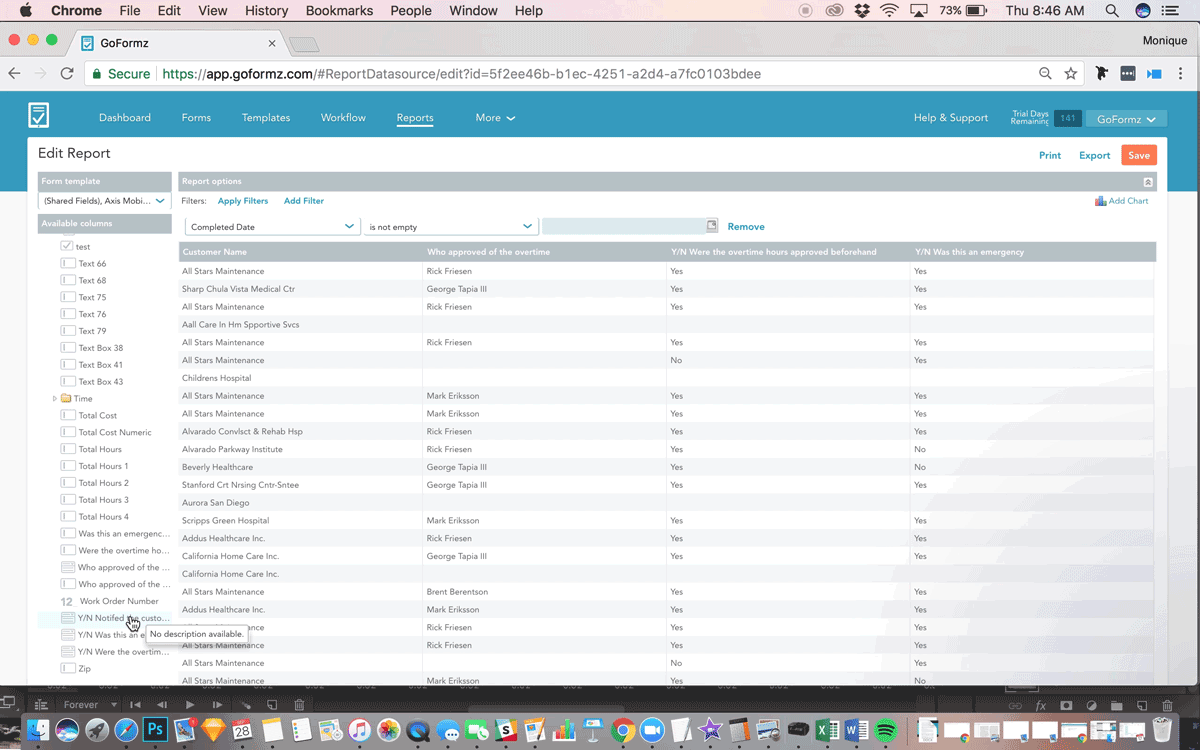
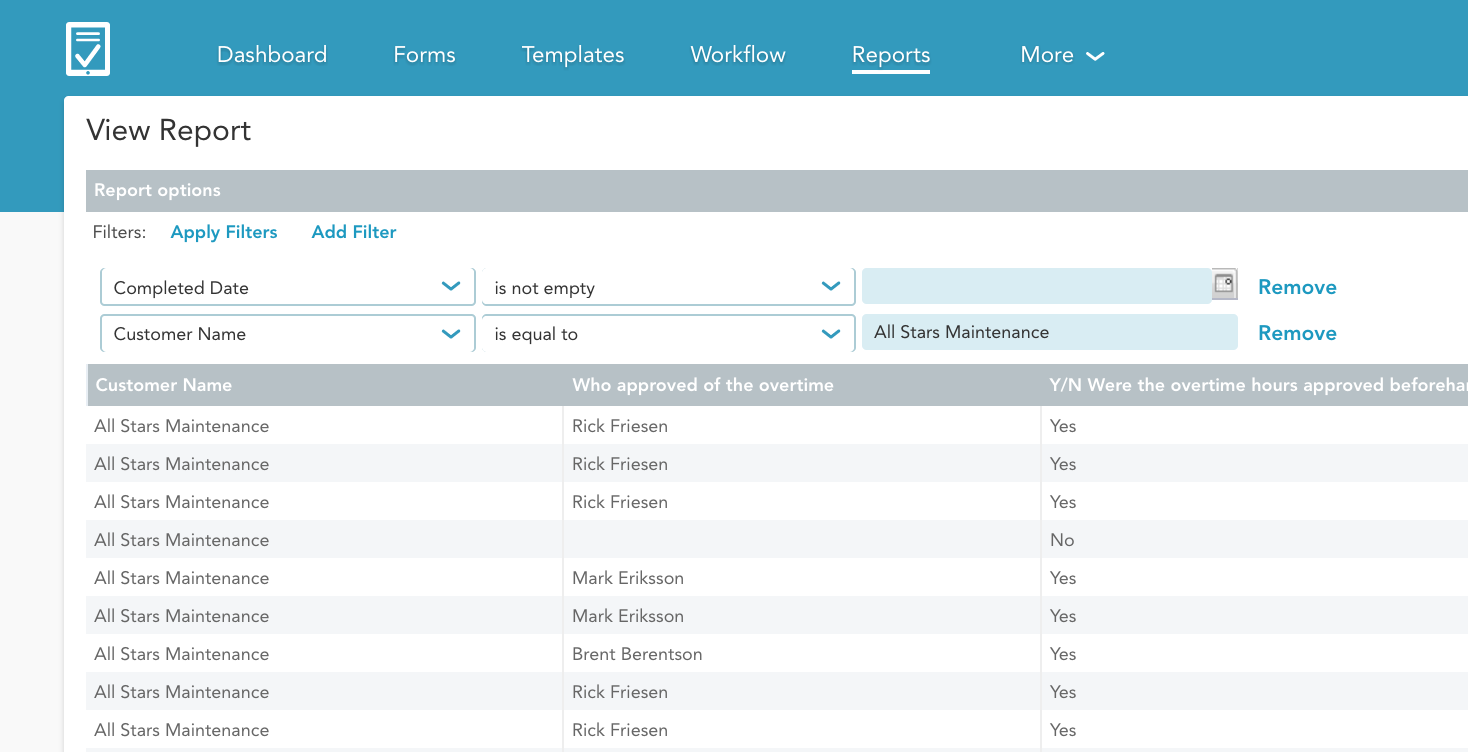
4. Apply your report filters, to restrict your report to only show data relevant to your reporting needs. For example, you can instruct your report to only show data submitted by a specific technician, or for a specific customer.
5. Now that you have created you report, you can organize your report in the following ways:
Arrange columns: Drag your columns left or right to modify where your column is displayed.
Column size: Adjust the width of your column using your cursor.
Sort data: Sort your data by name (ascending or descending).
Remove column: Delete a column by selecting ‘Remove’ from the column drop down.
Create Groupings: Organize your reports into column subdivisions (e.g. by customer) to improve report readability. Groupings also allow for ‘Summary Columns’ which accumulate data into summary values at the bottom of a Grouping.
6. Add Charts by selecting ‘Add Chart’ within the ‘Report Options’ area. The Chart Designer will launch, allowing your to add bar, pie and line charts. Note: Charts are only available with the inclusion of a summary column.
7. Save your report, you’re done! (Reports can be saved as a CSV or PDF)
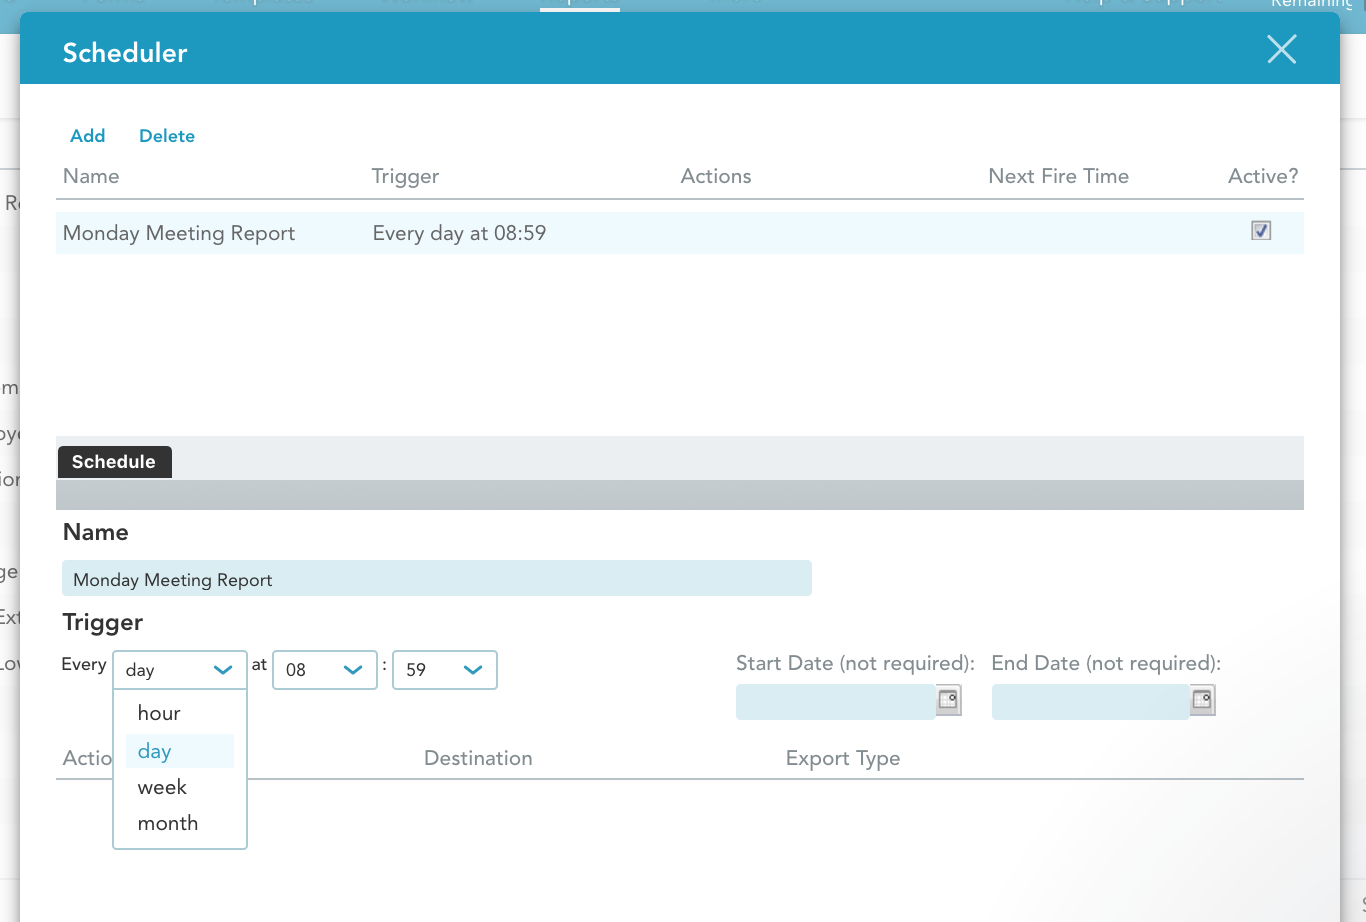
Schedule Reports
To simplify your data analysis and workflow, schedule regular reports to generate automatically.
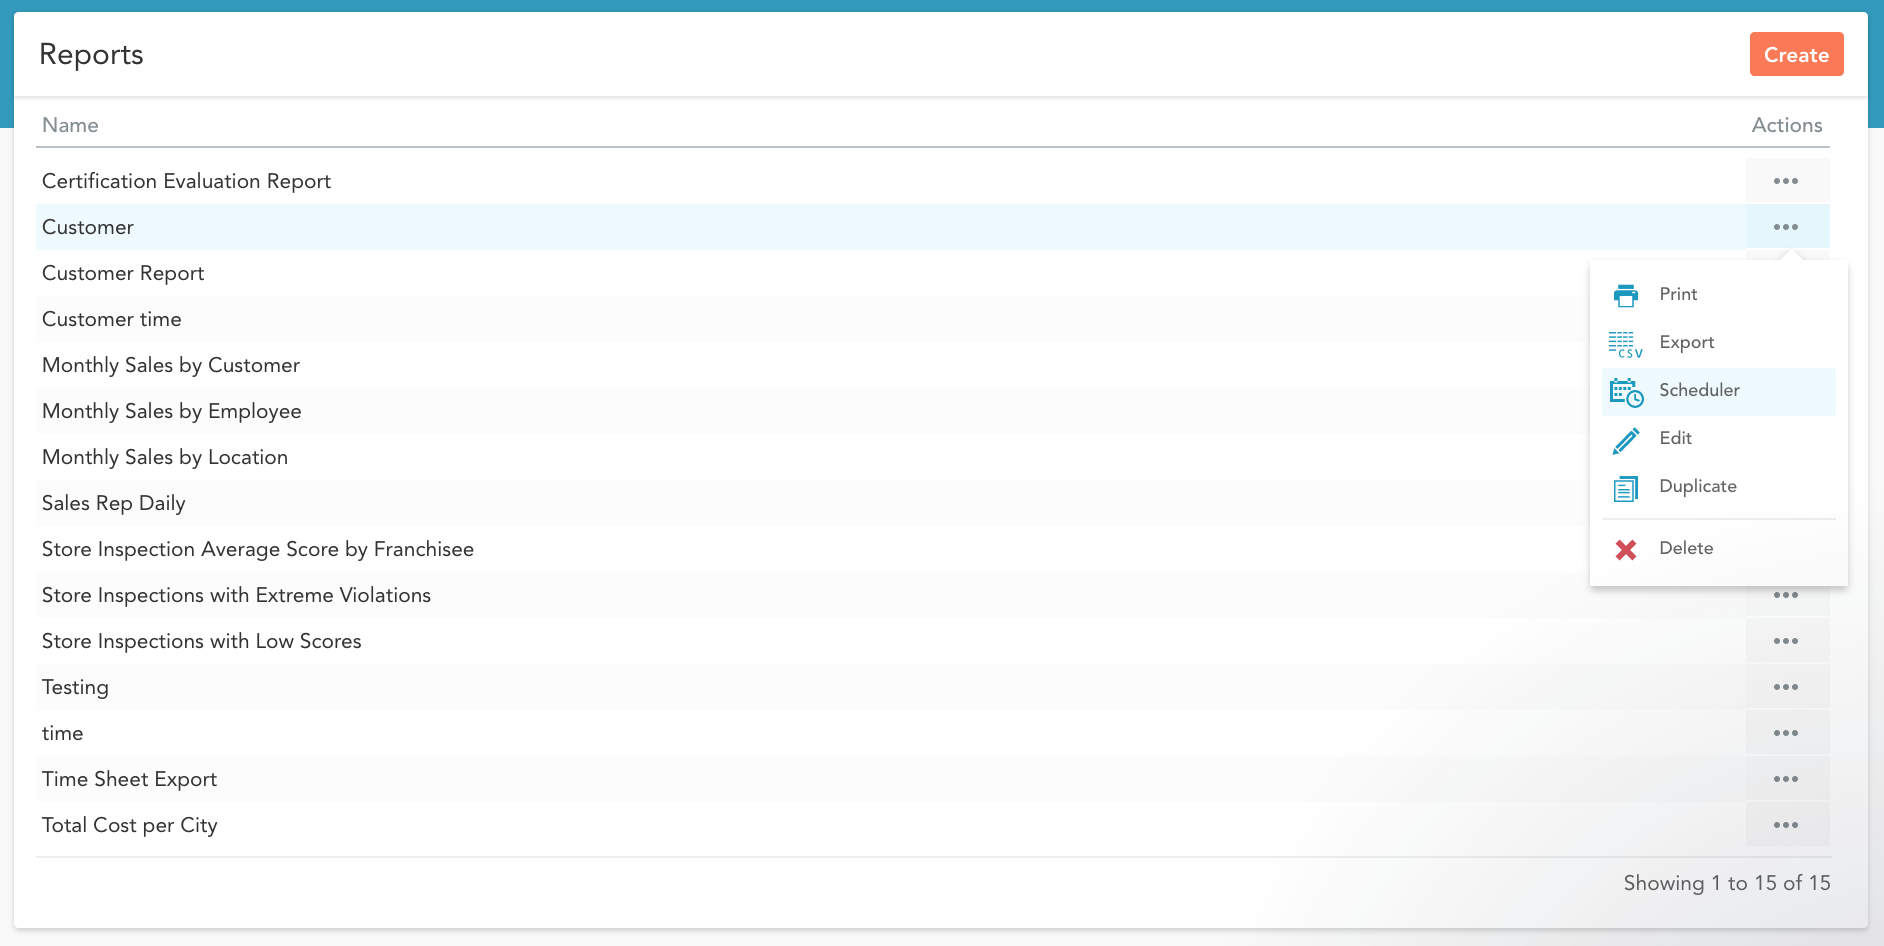
1. Open the reports Scheduler by navigating to the Reports tab, and selecting the Actions icon from the right hand side of the Report you wish to schedule. Select ‘Scheduler’.
2. When the Scheduler loads, select ‘Add’, and enter your new schedule name.
3. Add a ‘Trigger’ (which specifies how often your form will run). Your Trigger is comprised of four components:
The cadence (every hour, day, month, etc.)
Day/Time (the exact time the report should run)
Start/End dates (optional, dictate when this schedule will take place).
4. Set your ‘Action’. Your Action will determine whether the Report will be emailed to you, or saved to your Box account. For specific Box integration reporting instructions, please click here.
5. Save.