
ProTip: Set up weekly automatic reports.
One of paper’s biggest flaws is isolated data.
Recording data via pen and paper means data is trapped within a tangible document, going nowhere unless manually entered into another system or report. Paper-trapped data does nothing for your business, and risks losing data to misplaced documents, human error and other real-world vulnerabilities.
With digital forms, your data is not only secure, but made all the more powerful by insightful reporting and application. Setting up automatic weekly reports is one way you can enable your data to do more for your business. With scheduled reports, you can set fixed criteria for the data included, meaning as your forms collection grows, your reporting automatically adjusts to encompass capture data — a scalable, versatile solution to stale or rigid reporting.
Regular reporting allows management to gain further visibility into operational workflows, track goals and pinpoint opportunities to optimize efficiencies. Follow the steps below to enable automatic weekly reports for your business data:
Step One: Add your report schedule.
Once you’re logged into GoFormz, navigate to the Reports tab and locate the report you’d like to periodically generate. Click the [...] button, and select Scheduler.
The Scheduler window will open, and display any existing reporting schedules. Click [Add] to create a new schedule.
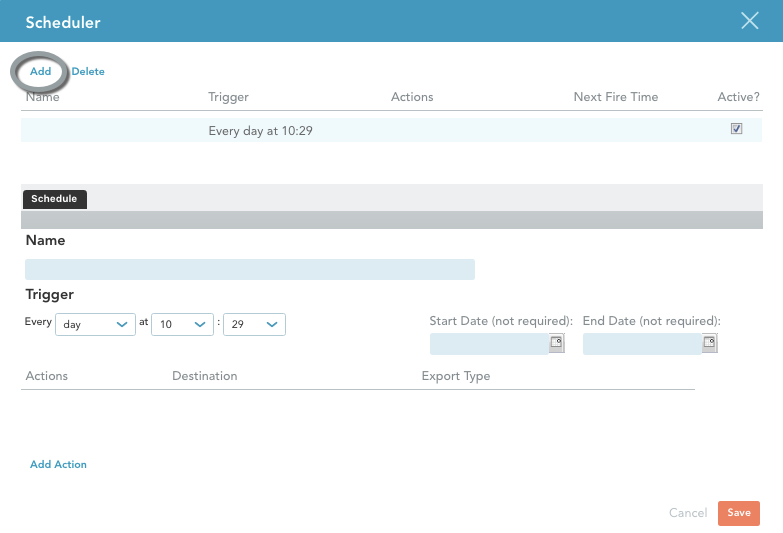
Step Two: Design your schedule.
Craft the perfect reporting schedule to meet your needs. Have a specific, regular meeting you’d like metrics for? Tailor your reporting to cater exactly to your data needs.
Add a name for your schedule within the Name field.
Add a Trigger. Triggers determine when and how often your report will run (e.g. a report can run everyday at 8:45). Triggers are structured by four factors: Cadence (run my report every hour, day, week, etc.), Day/Time (run my report every Wednesday at 10:30am — this field changes based on your selected Cadence), and the Start and End Dates (not required fields — add these dimensions if you’d like to restrict the time period reports are generated within).

Step Three: Design your actions.
Actions determine how a report is generated, and what happens once a report is complete. Design your reporting schedule to execute as you see fit.
In the bottom, left-hand corner, select [Add Action].
Select your desired action, either: Email or Save to Box. This selection will determine how your report is delivered, and whom it will be sent to.
If you selected Email: Your report will be sent as an attachment via email. In the Destination field, enter the email addresses of the recipients you’d like receive the report (separated by commas). Under Export Type, select either PDF or CSV.
If you selected Save to Box: If you have your GoFormz-Box integration set up, you can save completed reports to you Box account for easy record keeping and access. Within the Destination field, enter the name of the Box folder you’d like to store your report in. Under Export Type, choose either PDF or CSV. Then, determine whether or not you’d like this report to Overwrite past reports, or save as a new report, within the Overwrite field.
Review and Save.