
FAQ: What is an Automated Workflow?
Automate your daily processes with Automated Workflows
One of the many benefits of using mobile forms to capture your business data, is the ability to route collected information to other people and platforms in real-time. Once completed, your mobile forms can be instantly emailed to customers as PDFs, transferred to colleagues, uploaded to your CRM, Tagged for record-keeping and so much more.
These instantaneous actions are the result of Automated Workflows. So what is an Automated Workflow? And how can you configure one of your own? Automated Workflows are repeatable business processes, referred to as Actions, that occur as a result of predetermined Triggers. For example, if a sales representative were to complete an invoice, a PDF copy of the invoice could be instantly sent to a customer email address, provided within that very invoice. In this example, our Trigger would be the sales representative completing a mobile invoice and our Action would be the PDF being emailed to the customer.

Automated Workflows provide a powerful opportunity to enforce critical business processes and improve compliance. Ready to implement one of your own? Follow the simple steps below to enable your own Template workflow:
Login to the GoFormz web app from your computer.
Navigate to the Templates Tab and select the Template for which you would like to implement an Automated Workflow.
Once your Template loads in the Template Editor, select Manage Events from the right-hand corner.
The Manage Events Window will load.
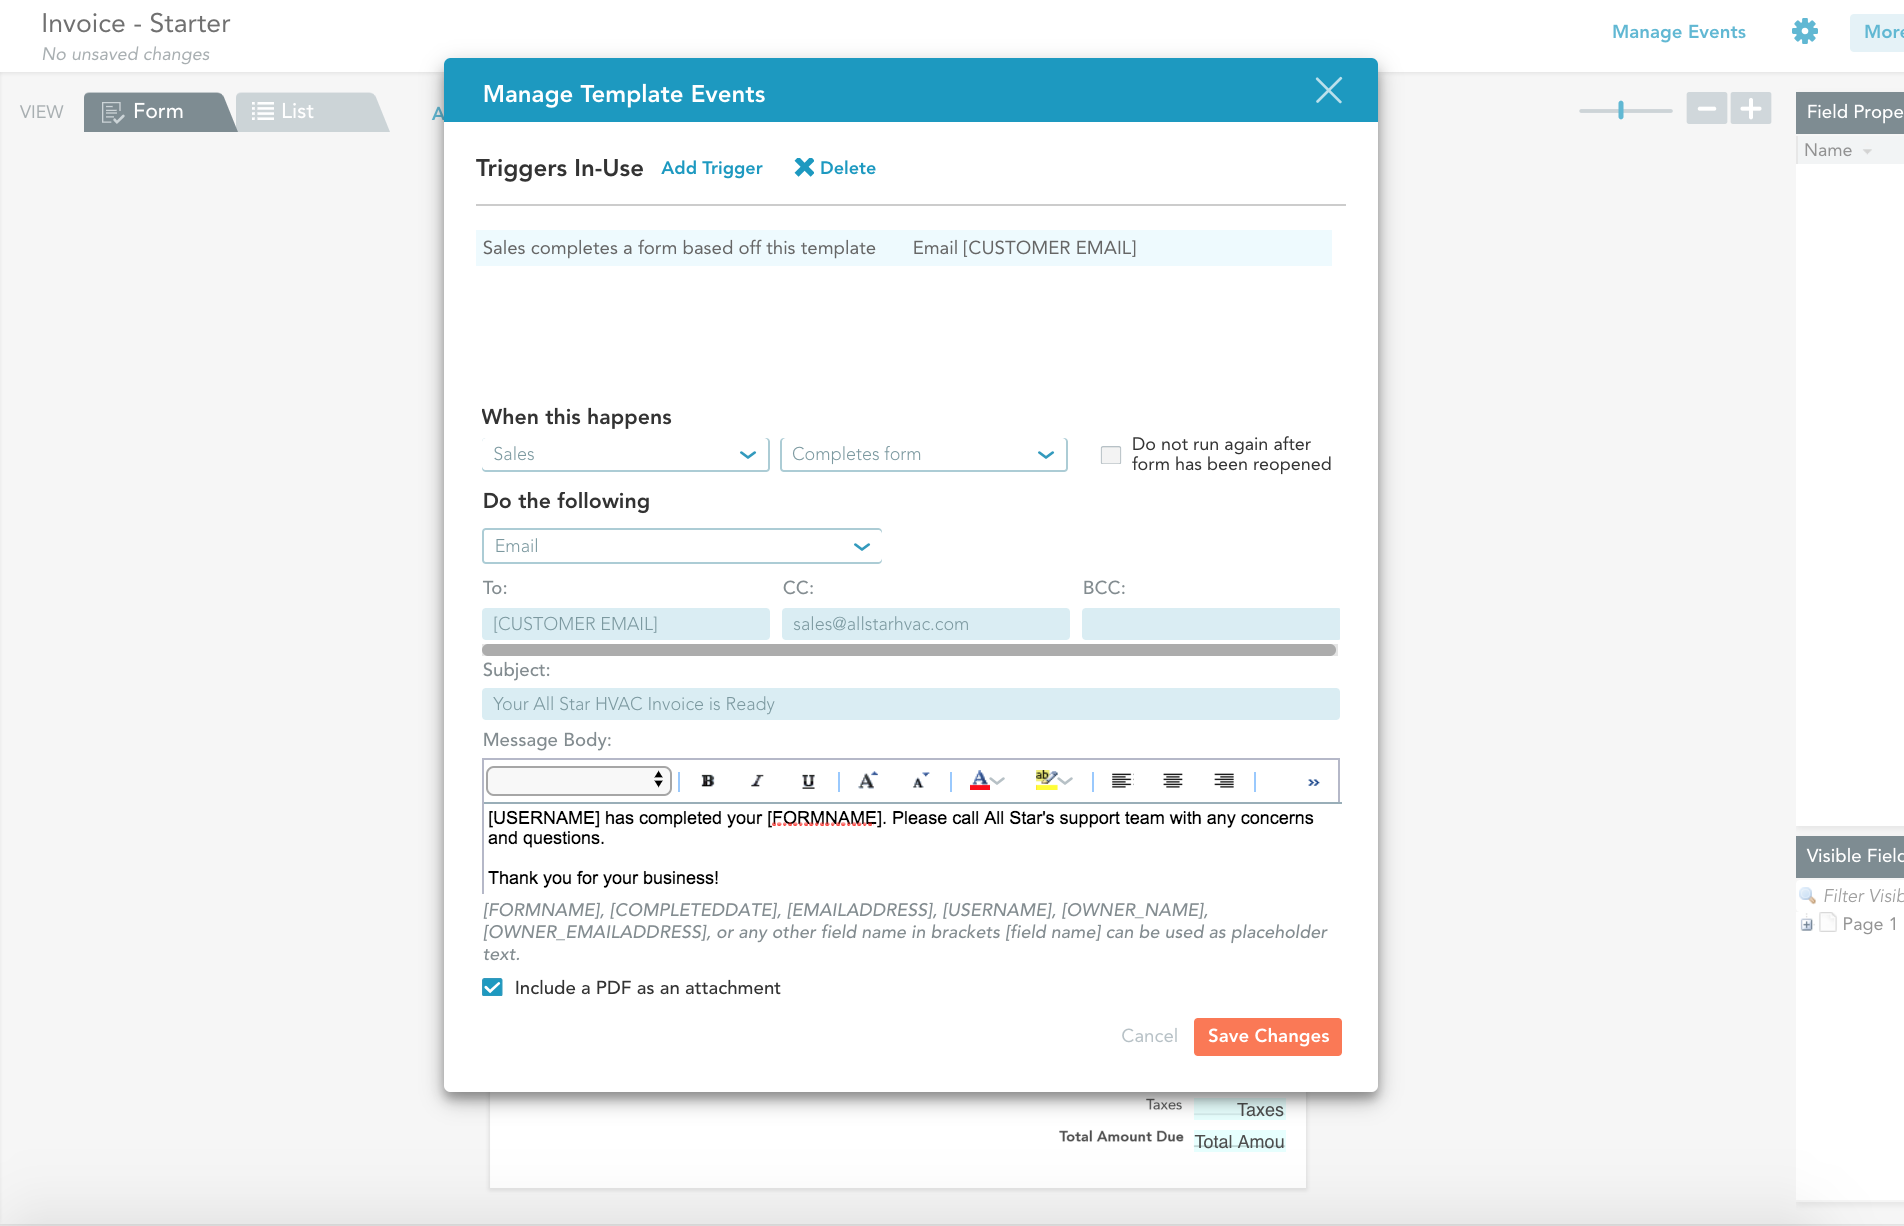
Add your Trigger (the event that will start the automation) by selecting Add Trigger. In the ‘When this happens’ section, design your event trigger by selecting a User and a Trigger. The selected ‘User’ specifies who completes the ‘Trigger’, which is the action completed. In our example above, our User was the sales representative and the Trigger was the completion of the an invoice.
Under ‘Do the following’, select the action you wish to occur. In this example, we are instructing our workflow to Email a PDF of our completed invoice to the customer email provided in the [CUSTOMER EMAIL] field. You can include field names in brackets to automatically insert data entered within your form, making your Automated Workflow tailored to each individual instance.
Select the checkbox at the bottom of the window, to attach a PDF of the completed form to your email.
Click ‘Save Changes’ in the Manage Events Window.
Click ‘Save Changes’ in the Template Editor.
Looking for more automation inspiration? Click the button below to watch a quick video and learn how GoFormz can transform your team's collaboration and efficiency.
