
How to Create Fillable Forms for iPhone
Creating fillable forms for iPhone is easy with the GoFormz drag-and-drop form builder.
With fillable forms for iPhone, your team can effortlessly generate forms, fill them out, and complete them from iPhones. Once submitted, these digital forms can be instantly accessed and reviewed, no manual delivery, fax, or postage required – accelerating regular business processes like billing, payroll, and order fulfillment.
Fillable forms for iPhone also help to improve the accuracy and completeness of captured data. Your digital forms can be easily equipped with logic and instant Calculations, which help guide data entry and enforce data capture rules (for example, specific fields can be made only editable for specific users, etc.).
To create your very own digital, fillable forms for iPhone, sign up for a free GoFormz account and login from a computer. Then, follow the simple steps below:
1. Upload your form or select a free Starter Form Template
A Template is the master version of your fillable form. Once you have set up your Template, you can fill out as many forms from it as you need.

You’ll have two options to create your fillable form Template:
Using a free GoFormz Starter Form Template
Uploading a JPG or PDF of your existing form to the GoFormz Template Editor
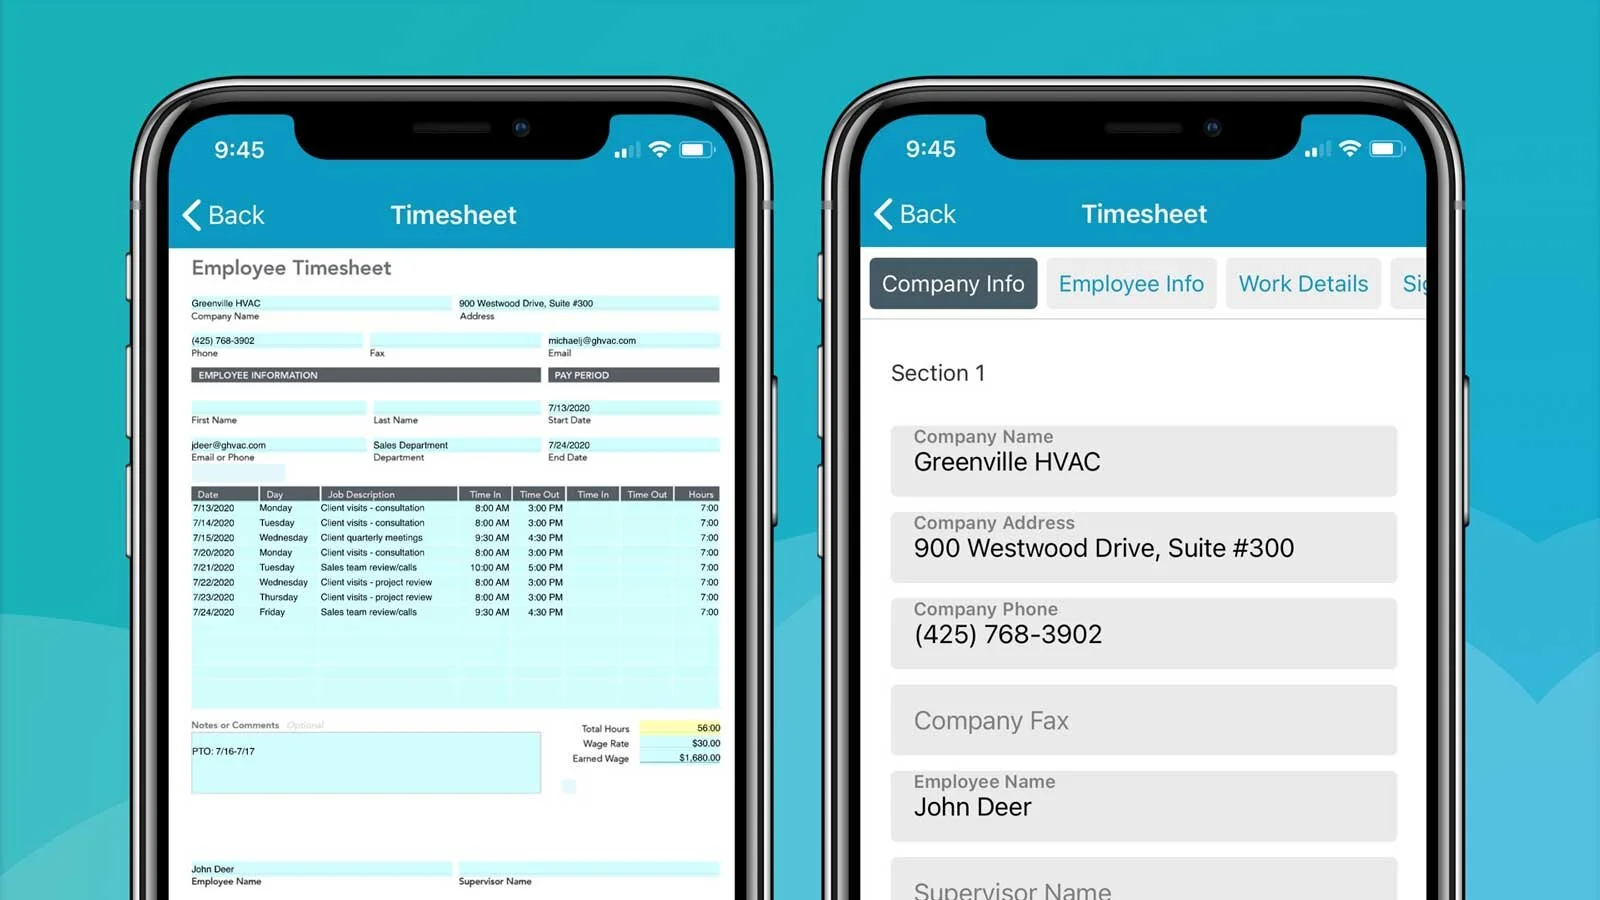
For this example, we’ll upload a PDF file of an existing timesheet. To upload our PDF and customize our timesheet Template, we’ll select ‘Upload a PDF’, upload our timesheet PDF file, and give it a name. Then, click ‘Create Template’.

2. Customize your fillable form Template
The Template Editor will load, with our timesheet PDF visible between two sections: Template Fields (which lists all of the fields you can add to your Template) and Properties (where we can configure how our fields look and behave). To customize our fillable form Template we will:
1. Drag-and-drop a field onto our uploaded form. Once we’ve added a field, we can resize it and change its location.
2. With our fields placed, we can now configure and customize their properties in the Properties section. Here we can change the name of our fields, make fields Required, change their color, and even add logic to make them dynamic.

(Optional) Configure your fillable form’s List View
With our form fields placed and properties configured, we can now configure our fillable form’s List View, a special viewing mode optimized for smaller screen sizes (perfect for iPhones!). Think of your form’s List View as an index of your form fields, which can be customized for streamlined data entry! Your List View can be organized into Tabs and Sections, allowing your small-screen viewing mode to mimic the intuitive organization of your Form View, but in an ‘app-like’ format. You can toggle between the two viewing modes as often as you need while using the GoFormz app on your iPhone.
3. Click ‘Save changes’.
(Optional) Automate your Template Events
Once you have saved your fillable form Template, you can select the gear icon to access even more customization options, including Template Events. In the Template Events window, you can configure your Template to instantly complete actions based on predetermined Triggers. For example, when a user in a specific Group completes a timesheet, your Template could instantly email a PDF copy of the submitted form to an email address input into the form, a supervisor, and more.
And just like that, you’ve just created your very own fillable form that can be completed from your iPhone (or any other iOS, Android, or Windows mobile device).
To learn more about creating digital forms with GoFormz, check out our Quickstart Guide and video tutorials!
