
ProTip: Using the Improved Sketch Field
Capture better, thorough data with the enhanced Sketch field
When filling out forms in the field that demand crucial information, such as hazards, weather conditions, incidents, and other pertinent details, depending solely on text can prove to be quite challenging in terms of clarity and comprehensibility. This challenge becomes even more problematic when relying on traditional paper forms for documentation, as they may not effectively capture or convey the necessary context. As a result, additional tools like cameras, expensive printing materials, and rigid record-keeping methods become necessary.
GoFormz simplifies this process by offering a powerful feature known as the Sketch field. In this blog, we’ll define what the Sketch field is, how to add a Sketch field using the mobile form builder, and discuss the most recent updates made to the Sketch field.
What is the Sketch field?
GoFormz users have the ability to bring greater context to captured form data through Sketch fields. Sketch fields allow users the ability to annotate Images. For example, job site images can be annotated to draw attention to specific safety hazards, incidents, and much more.
How to add a Sketch field to your digital form?
Adding a Sketch field to your digital form is easy and only requires a few simple steps:
Login to your GoFormz account from a computer and locate (or upload) the form you wish to add photos to.
Open that form Template and you will then see the Template Editor appear.
Drag and drop a Sketch field onto your desired form Template.
Click ‘Save’.

How to use the Sketch field
Whether you’re out in the field or sitting at your desk on your desktop, using the Sketch field is simple and adds immense value to your digital data collection. Here’s how to use the Sketch field:
Open your form in either the online Form Editor or in the GoFormz mobile app (available in iOS, android, or Windows).
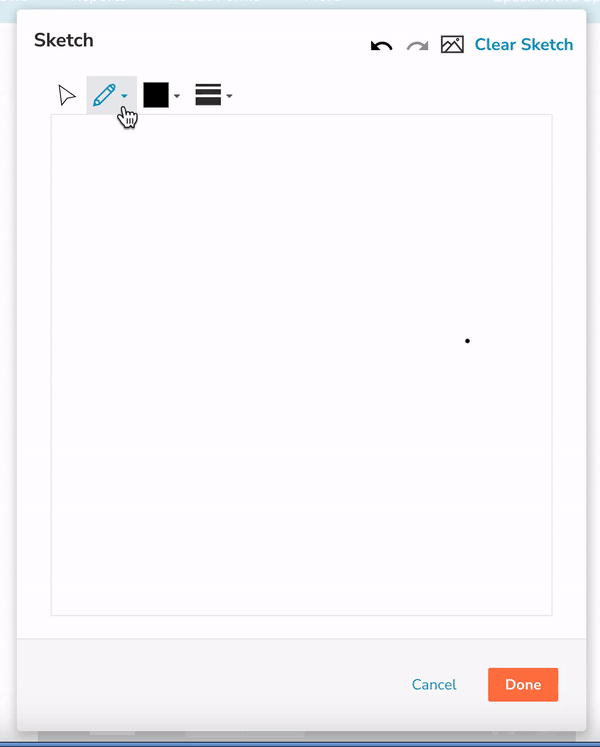
Select the Sketch field in your Form and then select the Image icon from within the Sketch window.
Either take a picture using your mobile device’s native camera or upload a photo.
Once you have added the photo to the Sketch field, you can now add annotations. There are several options you can use to annotate your image, including the Pencil tool, Arrows, Text, Circles/Rectangles, and more.
Add your annotations and select ‘Done’.
Finally, click ‘Done’ in the Sketch field window.
Important Note: The only difference between using the Sketch field on your desktop or on a mobile device is using a mouse or your own fingers to draw your desired annotations.
What updates were made to the Sketch field?
Select Tool Update: The select tool is now visible next to the general tool selector, saving users valuable time when editing their Sketches. To coincide with this update, the toolbar has also been update to show only available actions, simplifying the user experience. For example, the delete option only appears once an object is selected, further helping users to understand the actions available to them.
The Undo/Redo option: The Sketch field now features an undo/redo option. This will help users to restore Sketch when accidental changes were made or a change was made and the user wants to revert back to the previous drawing. The undo/redo feature can be found at the top of the Sketch modal next to ‘Clear Sketch’.

Whether you’re capturing data through mobile forms or leveraging digital forms on your desktop, GoFormz Sketch fields are a powerful asset to strengthen your process. To get started today, either sign into your GoFormz account or sign up for a risk-free 14-day trial of the GoFormz platform.
